Showing posts with label projects. Show all posts

Tuesday, January 25, 2011

Snowpeople 'Boxes'

Here are 3 more 'boxes' that I made for Christmas presents. I like to mix the old with the new.

I made this one for my girlfriend. She loves to shop and I thought the girly snowpeople with purses and hats were perfect for her. This is a wooden, possibly jewelry box, with an attached lid. The top of the lid has a vintage floral decal on it. I did have to stabilize the lid to stay up. The snowflake on the right is cloth, the large one plastic. Notice the tiny icicles.
I used batting for snow and threw some sparkles on it. There is a bird on the felt snowman's broom so I added a bird to the left front corner. I also used trees as another filler.

An army green metal box is the base of this one. I again used the tiny icicles and added glittered snow.
I have 2 more to show you tomorrow. Keep in mind that all I bought at the store was the paper filler. Everything else was in my stash or found at household sales.


Monday, January 24, 2011

Special Project

I went to a lot of sales this past summer and fall that I didn't talk about because I was buying items for a special Christmas project. I use boxes and drawers filled with stuff in my decorating and I decided to make them for my family. I picked up any small item I might be able to use. I was also looking for 'boxes'. I found some in basements full of screws and stuff but I would ask to buy just the box. I used batting to cover the filler.
This 'box' is a Kennedy Biscuit tin with a lid. I stood the lid in the back and secured it. I filled this angel one for my daughter and son-in-law. There are a couple special angels in here. In the lower left corner (click the pic to enlarge) is an angel made by my mother. The ceramic one in the front middle is one I had as a child.
The Christmas tree one was for my son and his family. The tree is cardboard and some sort of display piece. I put in a couple toy soldiers because my son almost always picked one as his yearly ornament. The doll bed in the middle is for his girls. There is a key stuck in back that said Smith's on it so I had to add it. This box is quite deep, army green metal with a handle on each side. I have no idea what it was used for. I filled the bottoms with plastic bags topped with shredded paper bag filler. I put a piece of material over it to act as a rug.
These were really fun to make. I also had a lot of fun searching for items to use. I made 7 in all so come back tomorrow for more!

Thursday, January 20, 2011

Scrabble

My daughter, daughter-in-law and I try to do a craft every Christmas and this is what we did this year.
I asked a couple girlfriends that do garage sales to be on the lookout for old Scrabble games. We found them for $2.00 to 25 cents. My son tore apart some pallets that were thrown away at work and my son-in-law cut them into pieces.
We all dug into our stashes, both girls scrapbook, and just had fun!


We used watered down paint for stain and scrap paper or cloth ribbon for the backgrounds.

Jerzie even made some. She made the snow one for Mommy and the star one is in her and her sister's room. She also made them for her teachers and a Bah Humbug one for Daddy.

We had a great time with these because we could really be creative. All together we made over 40! They were a big hit!
I'm planning to make some for my shop. Would you be interested?

Wednesday, October 27, 2010

Redo

Do you see a difference between my header picture and this one?
If you said the wall color you were right.

I was tired of the off white, shiny walls in my dining room so on Sunday I painted it.

The white and off white accessories stand out much better now. I don't have all the accessories up yet but I'm working on it.

There is a 'slanted' corner where the plumbing is located for the second floor. Several years ago we had to tear the wall down to fix the drain pipe, The contractor put up wall board and I painted but this area was not textured like the rest of the room.

I had a bucket of joint compound so I spread it on the wall. I cut notches in a foam brush to add swirls .

I think it came out pretty good. Once it was painted you can't tell the difference.

I'm happy with the color. I had to keep light because all my furniture is dark. I'll show you the rest when I finish.

Wednesday, August 04, 2010

Caterpillar house.

Laurie called and asked if I'd like a caterpillar for the girls to watch. Of course I said yes! They not only got us a caterpillar and milk weed but Uncle Chris made a nice home for them.
There are 3 caterpillars and they are growing like weeds.

Jerzie is fascinated by how much they poop.

They climb from the branches to the milkweed and back again.

This pic was Monday

and this one today, Wed.

When I was telling Jerzie about them she add, 'and they will turn into butterflies.' I'm not sure where she heard this but it stuck with her. We'll keep you posted.
Thanks Uncle Chris and Aunt Laurie!

Thursday, July 08, 2010

Junk Project

I've had this old copper boiler full of dahlias for several years. I leave it out all year so the patina gets better and better. This year I decided to dress it up a bit.

I had found three rusty 'spokes' from a wrought iron railing or fence at a household sale and hadn't decided what to do with them yet. I poked them in the dirt and hot glued the top ends together.

Then I glued a cup and saucer to the top. I keep water in the cup for the birds. It was just what I need to add a little whimsy to this old planter. This is why I love attics, basements and garages at household sales. You never know what you might find. If you like it, but it! You will find a way to use it eventually.

Friday, June 18, 2010

I need to quit...

...thinking!
The more I think, the more work I make for myself!
I thought it would be cute to have a chair by the table I showed you yesterday. I took one outside and realized the table wasn't tall enough for a normal chair. I tried this bench and it worked. I knew I couldn't keep it white but wasn't sure what color it should be.
After thinking for awhile I decided to paint it gray and then...
...cover it with cement.
It was just the touch the table needed. Now I need to quit thinking and enjoy!

Thursday, June 17, 2010

Inspiration!

Chris and Laurie had to have a tree cut down this year. When Laurie saw the trunk pieces, she thought of this. We saw this awesome table on a garden tour a few years ago. She e-mailed me a picture and asked if I'd like one. You know I said YES!
Chris used a hoist for a car engine to get the wood into his truck. He brought a piece of plywood and put it on top of the stump. We decided how to cut the plywood and I started covering it with cement. (Remember that 90 lb. bag of cement I bought!)
Laurie had the idea to put ferns in the table top. I had accidentally broke off some pieces of a large fern when I was trimming. I pushed them into the wet cement and left them for a while.
I LOVE it and think it's a perfect addition to my shade garden!

Friday, June 04, 2010

Hypertufa

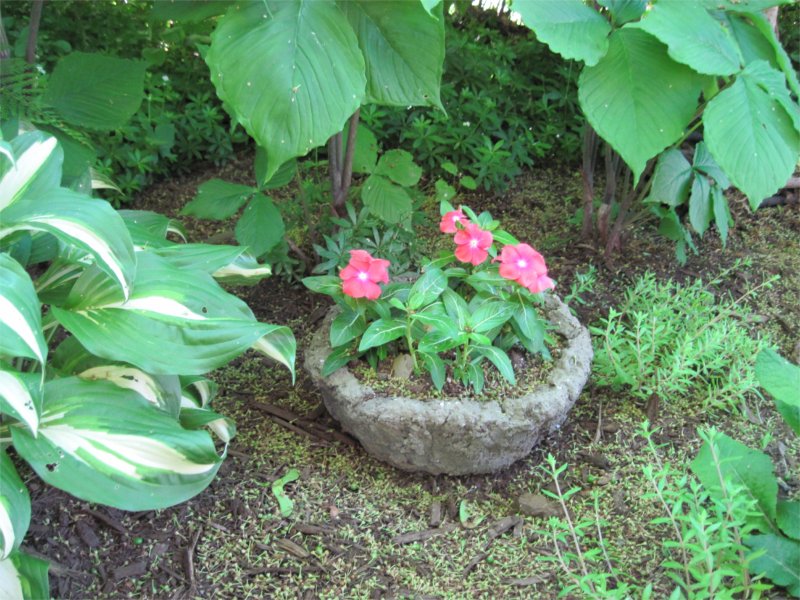
I love the look of concrete bowls in the garden but hadn't been able to find any at household sales. I saw some articles about hypertufa and decided to give it a try. The recipe I used was
1 part Portland cement (no stones)
1 part perlite
1 part peat moss
1 part water (approximately)
The perlite and peat add texture and keep the items fairly light weight.I got a few different shaped plastic items and covered them with plastic wrap. (The recipe says you can also use Pam but I didn't try that.) If you want a smooth surface on the outside then use the inside of the bowl. I did learn that the item must be the height you want so the cement holds itself up. I should have cut the tops and handles off the green bowls.
The urn like item is plastic and I got it for 50 cents at a sale. I used it for a base and just covered it with cement. Remember to put holes in the bottom for drainage.
These bowls are great to add color to my shade garden and can be easily moved to different areas. The bowl for this one was the largest bowl from a cheap plastic set.
I planted a fuscia in the 'urn'.
Impatients in most of the others.
This was a fun, fairly inexpensive item to make that requires no special skills. I had to buy a 90 pound bag of concrete which is way more than I needed but it was still fairly cheap[.
I'd be interested if you've ever tried it to see what you made.
Let me know if you give it a try.

Friday, May 14, 2010

1+1=?

One free piece of old wainscoting
plus one 12 dollar vintage ladderequals
a shelf for a small area.
This inexpensive shelf is a perfect fit!
Check out Trash to Treasure Decorating for other ideas.

Friday, April 09, 2010

Favors

I dug thru our stash and came up with a cute table favor for Jerzie and I to make for Easter.First we painted some wooden flower pots to look like clay pots.
Payton even got into playing with the stash!
We filled the tiny pots with grass
and some little pearly eggs.
Next we glued a flocked pastel bunny to the top. The girls bunnies are in front because their pots are smaller.
We had our Easter dinner on Monday because I had to work on Sunday so Jerzie got to help. She picked the tablecloth and the napkins. Jerzie had kept out little secret so she was very proud for everyone to see our cute surprises.